Showing posts with label brows. Show all posts

3 Reasons Why I'm Back To Black Brows


on ,

8 comments

As I got accustomed to getting my hair colored, I made sure that my stark black brows undergo regular lightening too as I feel I wouldn't be able to get away from a potential beauty faux pas.  But recently, I started sporting my old black brows again.
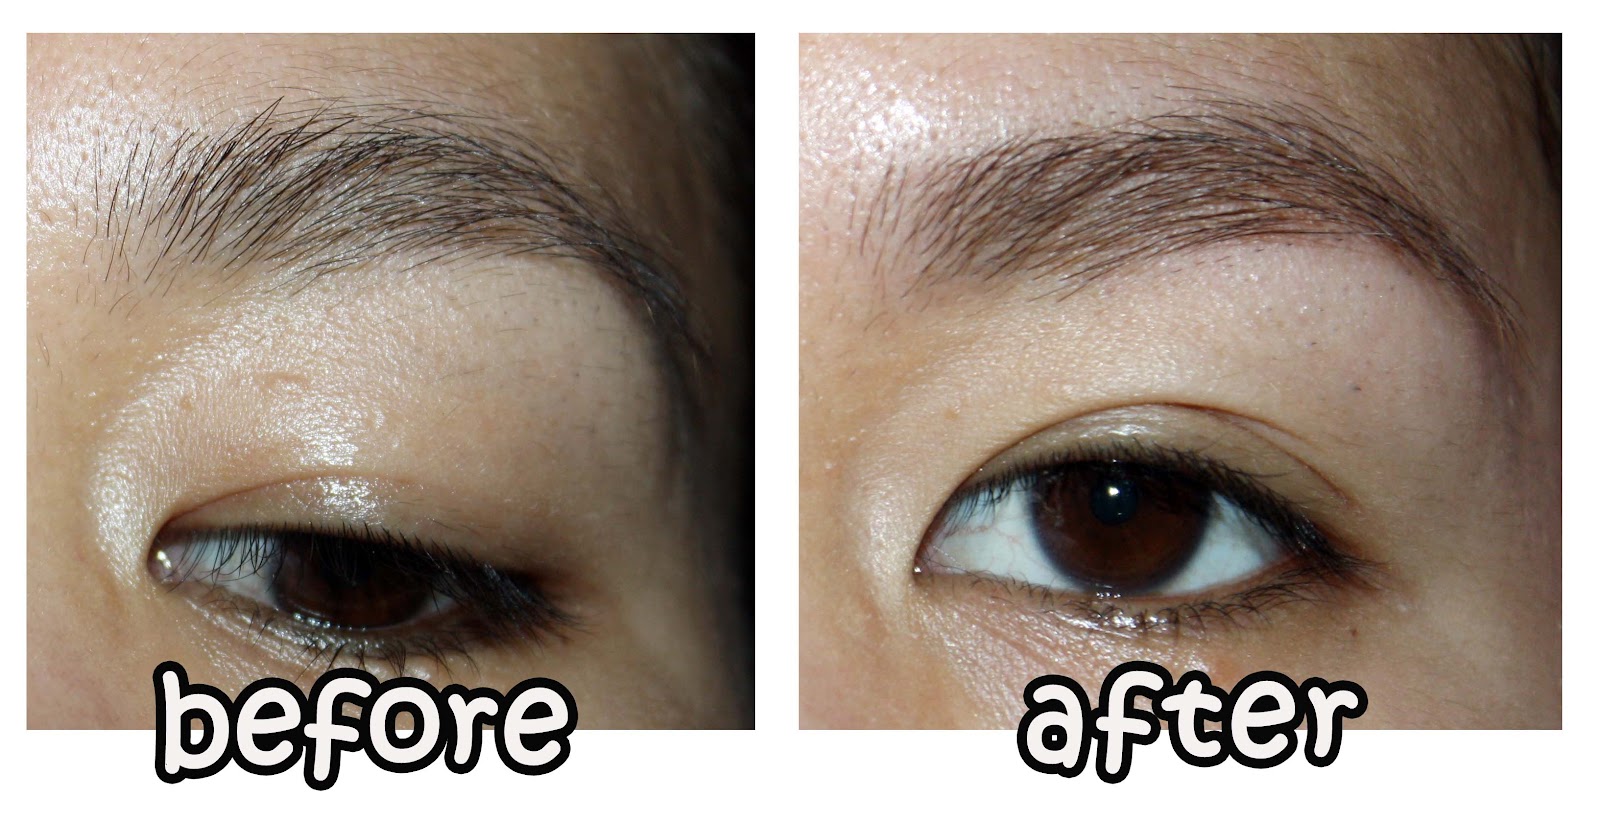
       Raising both brows for subject emphasis lest my syringoma and pores take all the attention


It isn't because I got too lazy bleaching them nor have I had a change of heart (I still cringe at the thought of my contrasting brow-hair color!), but because of three inevitable situations that keep me from dyeing them again:

1. The Sally Hansen activator dries up quickly.

Waaay too quickly if I may be precise. I have purchased two Sally Hansen Bleaching Kits in a row and both activators gave me a maximum of three uses instead of the usual seven.

The Sally Hansen bleaching kit contains an activator, a dry bunch of granules you mix with a bleaching agent, a moistened, creamy mixture.


I normally finish up the set after 6-7 brow dyeing sessions but this time, I felt I was totally ripped off with just 3 uses. I decided to give it the "2013 rip-off award" since it happened two kits in a row.

So yes, I'm currently wearing black brows.


2. Andrea Gentle Creme Bleach has been out of stock for months now.

I bumped into the Andrea Gentle Creme Bleach (prior the 'just-3-uses' nightmare) when Sally Hansen kits started to run out of stock. I love this product as it is relatively cheaper, yields more dyeing sessions than Sally Hansen's, and does a good job in giving my face an overall softer look.

But two months ago, I walked out of Beauty Bar (where I purchase it from) without the product and only a scribbled promise in my hand:


Andrea Gentle Creme Bleach was out of stock! SA's gave me the branch contact number suggesting I check with them in a few weeks' time. Months have passed now, no new stocks have arrived.

So yes, I'm currently wearing black brows.

3. I recently discovered the Majolica Majorca Brow and Lash Colorist.

For someone who hates black on brown, it's surprising that I'm still not looking for new ways to lighten my brows. Thanks to an awesome brow coloring makeup, I am currently surviving.

I should already come up with a review on the Majolica Majorca lash and brow colorist as I've been using it the entire time I boycotted the Sally Hansen bleaching kit and while waiting on the return of the Andrea Gentle Creme Bleach. I use the lighter shade, BR333, and while it does not result to looking like my bleached brows, it keeps my face framers from looking very black and that's all that matters for now.

I take off all traces of makeup at the end of the day so the fact remains I'm still wearing black brows.


While writing this post, I couldn't help but congratulate myself for being able to deal with black brows against brown hair for months! I also should give the Majolica Majorca Brow Colorist a pat on the cap for providing a temporary fix. But, I'd be lying if I told you I'm okay with how my brows are today because I'm seriously missing brownish brows. I'm a few nudges away from retrying Sally Hansen so do pray that Andrea restocks their bleaching kits soon!

Brow Dye Die Hards Alert: Andrea Gentle Creme Bleach Review


on ,

13 comments

Since I dye my hair quite often, I make it a point that my brow color stays in harmony with my crowning glory's. I first met the Andrea Gentle Creme Bleach when I grew tired of hearing beauty attendants saying that the Sally Hansen bleaching cream is out of stock. I knew right then I had to look for another effective brow bleaching brand.


Where to buy: Beauty Bar
How much: 300php for 42g of bleach and 28g of activator
Shelf-life/Expiration: 24M

Application and Results. Preparing the product is easy. Quite easier than the Sally Hansen bleaching cream because the activator comes in cream form and not in the usual difficult-to-scoop-out granules. The Andrea Gentle Creme Bleach contains an instruction guide but allow me to repost, in photos, what the guide says:


  1. Squeeze 2 1/2-inch strip of Creme Bleach into mixing cup. Measure by squeezing creme in a full circle once around the inside of the bottom rim of the mixing cup.
  2. Squeeze Creme Activator into the mixing cup making a semicircle on top of the bleaching creme. 
  3. Using the spatula provided, mix the two cremes thoroughly with rapid strokes.
If you hate the Sally Hansen bleach for its strong ammonium-ish odour, Andrea's rather faint scent may come as a surprise (and an advantage!) for you. I apply the creamy mixture as shown in the photo below and make sure that all the hairs are covered from roots to tips.


The first time I used it, I failed to cover all the hair (see photo below) and missed on sweeping the spatula toward the nasal area. The result? Unevenly bleached brows with the hair roots remaining black. It wasn't anything stark obvious but upon close scrutiny, it's a silent disaster. 

Bleach it right by following the tip given on the above photo and covering all the hair like how I did it in this post.


I leave the mixture on for 8 minutes. I find that this a gentler version of Sally H's because I rarely worry about overbleaching. You know how I leave on Sally H bleach in two bouts: first 4 minutes and the second 4 minutes? I do it in that manner because I always end up with orange brow tips when I do a full 8-minutes. 

Sally Hansen Replacement? Nope. But it's a good back up whenever Sally Hansen isn't available. Also, Andrea Gentle Creme Bleach appears to give me coppery brows while Sally H keeps hair bronzed out.

Andrea's hair lightening properties are a little weak and therefore, the risk of overbleaching is low.

What I love about it:
  • cheaper than Sally H's and never goes out of stock (don't you just hate it when you need something so bad and stores tell you that they ran out of it?)
  • I end up with a more natural-looking, lightened brow color
  • no-drip, creamy formula (you never have to worry about drowning your eyes in bleach)
  • faint ammonium scent
  • the activator does not dry out. have you ever experienced Sally H's activator grains melting out despite tightly sealing the container?

Uh-ohs:
  • first time I used it, it stung so bad (even after passing the patch test) and caused the skin around the brow area to redden
  • it still did up to the third time I bleached
  • bleach dies down fast relative to Sally H's

It's ironic that I find the Andrea Creme Bleach a less stronger formulation (i.e, milder scent, no need to section application into 2 sets, bleach wears out faster) but has caused stinging and redness on my skin. 


Recommendation. Highly recommended to those who consider brow bleaching paramount to their primping habits and can hardly get hold of the Sally Hansen bleaching kit. I'm still thinking if I'll repurchase the Andrea Gentle Creme Bleach. I rebleach so soon with it but when I think about Sally Hansen's activator powder melting (rendering it useless) after 4 uses, I begin to consider switching brow bleaching brands.


ELF Studio Brow Kit in Light Review


on , ,

5 comments

The ELF Brow Kit is probably the cheapest, most effective brow product out there that has a wax component to it. This is the highest-rating ELF brow product to date over at Makeupalley, where 164 reviewers gave it a 4.3/5 rating (I personally say that a 3.5 score from 100ish reviewers is already quite high) and 79% of them would repurchase the product.

Will it fare as good for Pinay brows? Oh how I wish we had our own version of Makeupalley...

ELF Studio Brow Kit Performance

Sans brow makeup, I have a relatively thick set of bleached brows with defined arches, thanks to my gradually developing brow grooming skills. The problem is, my brows are noticeably sparse on several areas and I need a good brow product to add fullness to these face framers.


I was able to achieve a more defined brows that softened my overall look with this brow kit. I loved how natural-looking my brows turned out, as if they were never really sparse to begin with. With my face neatly framed by a set of softer-looking brows, I was a happy camper! However, I'm thinking that if my brows weren't bleached, the brow kit in light would not have suited me. 

It is also essential to note that the brow kit is "makeup newbie-friendly" since it posed lesser chances of me ending up like Bert from Sesame Street. I usually end up looking cartoonish if I'm experimenting with brow pencils. It is sheer irony that a 3-step brow product is far more easy to use than the popular 1-step brow pencil.


Shade Selection and Packaging

On the US website, this amazing ELF Studio brow kit comes in 4 shades: dark, medium and light and ash. Unfortunately, our local counters only carry the kit in light.


The brow kit is housed in a small, lightweight, plastic flip casing. It comes with a small mirror and an impressive double-sided taklon brush. I really wish they sold brush backups since the angled brush end can wear out over time.

Product Highlights 

  • easy to use
  • wax and powder blends perfectly to give out a flattering color for those with light skintones
  • cheap yet effective
  • don't let the small packaging fool you, the kit can last you several months 
  • you can easily tote it in your bag for touch-ups
  • the brush that comes with it is not something you'll throw away


The Letdowns

  • the shade 'light' does not suit majority of the Filipina population
  • you'll need to swipe a LOT of wax so that it finally shows up
  • you end up hitting pan on the wax way before finishing up 50% of the powder (that's how much wax you need); they should come up with wax separates in addition to the double-sided taklon brush
  • intensity of color dies down by midday, however, it's nothing that touch-ups can't deal with
  • frequently out-of-stock

Price, Availability, Ingredients

The ELF Studio Brow Kit costs around 250php over local counters, and $3 on the US website. You can get it from local ELF counters at SM Beauty Section, from those holding pre-orders, and from resellers (ebay.ph and multiply).


(taken from ELF website) Brow Gel Ingredient:Paraffinium Liquidum (Mineral Oil) , Ricinus Comunis (Castor) Seed Oil , Talc , Copernicia Cerifera (Carnauba) Wax , Ozokerite , Methylisothiazolinone , Caprylyl glycol  May Contain:Iron Oxides(CI 77491 CI 77492 CI 77499) , Titanium Dioxide (CI 77891)

Brow Powder Ingredient:Talc , Mica , Caprylic/Caprictriglycerides , Hydrogenated Polyisobutene , Sodium Dehydroacetate May Contain: Iron Oxide(CI 77491 CI 77492 CI 77499)

Recommendation

I might discourage friends with really thin and sparse brows from purchasing the kit in Light (I'd rather they use pencils OR wait till the 2 darker shades become available). I'll highly recommend this to makeup newbies, NC15-25ish, who'd want to experience the power of a properly framed face. With this product, it's definitely possible to sport nicely shaped and natural-looking brows on a daily basis.

I feel that more Pinays can experience the ease of having natural-looking brows if the ELF studio brow kit came to our counters in more shades. Dark and medium, sail to our shores please! I feel that if these two become available, I'll be striking out letdowns 2, 3 and 4 off that long list!


How I Shape and Groom My Brows


on

5 comments

A lot of youtube beauty gurus and beauty bloggers have already attested to how shaping and grooming the brows can make a huge improvement on how the face looks like.

BEBEXO taught me how shaping is done while GLINTZY influenced me on how eyebrow grooming should be like (all tools used in the two tutorials are available at local Beauty stores: Watson's, Landmark and SM Beauty). 

Here's a before and after photo of my brows. You will notice that my brows look lighter after shaping and grooming, all thanks to the Sally Hansen bleaching kit


Coloring, shaping and grooming the brows
I can even improve them by putting on a little brow makeup (a browset/wax or minimal filling)


Personal Advice. I strongly encourage that you first bleach the brows a day before you head to shaping and grooming them. I've tried doing conversely, but the results weren't as nice. It's best to shape and groom the brows after lightening them if you do not want to end up with an accidentally thinner brows (bleaching makes the brows look thinner; imagine if you've groomed/shaped in an already thin fashion, the brows become far more thin if you bleach it afterwards).

I can definitely say that my face improved just by paying attention to my brows' shape and color. I believe that brow grooming, shaping and bleaching are fun things to go through with tons of benefits. I now have that very natural and nice arch that frames my face to make me a bit more classy to look at.

Sally Hansen Bleaching Kit Review


on

10 comments

Ever since I dyed my hair a lovely light ash brown, I was compelled to make sure that my brows were not as black as it naturally is. I always use Sally Hansen's Creme Hair Bleach to turn my brows into a natural-looking brownish shade. (you can check out how weird my black brows look on brown hair HERE)

Now, there are two types of Sally Hansen Bleaching kits out there, Extra Strength and Bleach For Face.

Sally Hansen Creme Hair Bleach Extra Strength ~510php ($10)
available at Watson's, SM Beauty, Landmark Dep't Store


Sally Hansen Creme Hair Bleach For Face, ~360php ($7)


Label Says: quickly and effectively lightens dark, unwanted hair so that it blends beautifully into your skin tone with natural-looking results. Just one application softens and fades dark hair so it becomes unnoticeable. Easy to use, even if you've never bleached before.

  • smooth, no-drip formula
  • mixes easily
  • fast-acting yet gentle
  • sweet almond scent

Product Efficiency. This kit does its job in lightening my brow color to suit my dyed hair. I love how  bleaching gives the face a softer look and defines the brows in a more shapely manner. The fact that all these can happen at home rather than heading to the salon is superb. The instructions that 

How to bleach/dye the brows; Sally Hansen Creme Hair Bleach For Face
              comes with a detailed and easy-to-follow instruction leaflet


However, I experienced that there is a tendency to over-bleach the hair if I follow the leave-for-8minutes instruction that came with it. I squirm at the sight of white-tipped hairs when over-bleaching happens.

Prevent Over-bleaching. Through time (been dyeing my brows with Sally Hansen's Creme Hair Bleach for 2 years now), I realized that the best way to prevent hideous white-tipped hair with Sally Hansen's bleaching kit is to do 2 sets of 4-minute application. Instead of leaving the cream for a full 8 minutes, break it into 2 sets. 

Do not be alarmed if you still see a somewhat black hair after the first 4-minute application. Wait for 5 minutes before re-application, and you might see a lighter set of brows after this last set.

How Sally Hansen Creme Hair Bleach works on me:
topmost: black brows
middle: first 4 minutes of bleaching
bottom: after 2 sets of brow bleaching

You don't need to create mixtures twice. The initial mixture you have created will be enough if you have thin or medium-thick brows. Fuller brows might have to do a 'second serving' of the mixture.

Frequency Of Use. I use the kit every two weeks.


Extra Strength vs Bleach For Face.  


Bleach For Face
Extra Strength
Price
~P360 ($7)
~P510 ($10)
Tools in the Kit
Crème, Activator, mixing plate, spatula, instruction leaflet
Crème, Activator, Pre-Conditioner, mixing cup, spatula, instruction leaflet
Non-Drip
Yes, once crème and activator mixes well, it creates a non-drip formula
No, wait for an additional 2minutes while mixing to create a frothier mixture, if you don’t, it drips
Gentle Formula
May sting, expect a lil redness that will go off within 10 minutes
May sting, expect a lil redness that will go off within 10 minutes
Availability
Easily runs out of stock
Almost always available
Scent
Unpleasant but tolerable
Net Wt
Crème 1 oz/28.3g
Activator 0.25 oz/7g
Crème 1.5oz/42.5g
Activator 0.75oz/21.2g
Pre-Condish 1 oz/29.5mL


I'd get any of the two depending on my budget because they work pretty much the same. If you have other problem areas that need bleaching, you're better off with Extra Strength.

Additional Tips. Make your Sally Hansen Creme Hair Bleach experience worthwhile.
  1. Make sure to follow all instructions except the 8-minute rule. 
  2. Tighten caps and lids to prevent product spills. 
  3. Don't forget to do a patch test on the wrist before using the kit on the brows. 
  4. Cover the hairs fully. Poke the brows with the spatula applicator to make sure you tuck in some cream on the base of the hairs.
Ho, ho, ho... merry Christmas!
I'm using the Extra Strength; like it's gonna drip on my lids!
to make it non-drip, please see chart above
I am satisfied with the results every after bleach. My brow photos above still look blah but please stay tuned this week for a post on how I groom them.

I have been repurchasing Sally Hansen Creme Hair Bleaching Kits for the longest time. It works well to help me achieve a softer-looking face through lightened brows and prevent me from looking funny when I dye my hair brown.
-----------------
UPDATE: In the not-so-recent months, the Sally Hansen Creme Bleach Kit always runs out of stock. If you get to experience this, you may opt to use the Andrea Gentle Creme Bleach.


Introducing: the Bleak Angled Brow Brush


on , ,

6 comments

I was about to throw out my Fashion 21 Eyeshadow Brush when my brain suddenly switched to its creative mode.  Why not turn this unused tool into something useful?

And so with a pair of scissors, I chopped off some hair until I got the 'look' I wanted.

BEFORE - Fashion21 Eyeshadow Brush, 60php


AFTER - herroyalbleakness' angled brow brush!


A closer view of the hair and ferrule


What I love about it is that it isn't too thin like an angled liner brush!  Think of something in between a liner brush and a shadow brush--- that's the bleak angled brow brush!  The lines I create with it when filling-in sparse areas of my brows are very, very natural and flattering (vs. angled liners).

So how'd I revamp a relatively denser eyeshadow brush into a bleak angled brow brush?

I had to cut off half of the hair sagitally, like so:

Looks ugly, but this is what makes it so pretty as a brow brush!


Not too thin, not too thick--- purrrrfect!


I'm now using this Fashion 21 eyeshadow brush with my In2it brow kit (remember how I disliked the small brush that comes with it?).  It works perfect in picking up the ample amount of pigment that I need for my brows!

Yep, even brushes can go through a makeover.  I can't believe myself for almost throwing this one out!


Review: In2it Eyebrow Powder Sure Lasts Loooooong


on , , , , ,

14 comments


I played with my computer's camera when I got home from classes and I was a bit disappointed with its resolution.  But what surprised me was that that my brows still looked thick and neat even after 10 hours of being in the humid, polluted and sweat-provoking metro.  Haha!  And oh, I used In2it Eyebrow Powder.


In2it's Eyebrow Powder has always been raved about by the girls over the forum I frequently check out.  And I'm glad I tried it out for myself!  I went out of the house in the morning with perfectly clean-looking eyebrows, and I went home with the same look I sported in the morning (well perhaps, a little subdued now, but it still looks fresh!)


In2it eyebrow powder, around 300+php (~$6)


Some people might find the lightest shade on the left unusable.  But I use that shade for the inner 3rd of my brows, and the middle shade for the outer 2/3rds.  And they look awesome!  I grew my brows thick and this kind of shade tandem just accentuates my thick brows without making me look like Oscar the Grouch.


It even has a cute mirror up there!


What I love about it:
the colors suit Asian skin; all colors are usable
keeps my brows neat and clean the whole day
very natural-looking on me, i can sport a full but soft-looking brows
they don't turn reddish on pictures
cheap and locally available

Uh-Ohs:
a bit chalky since I see particles of it on my lashes
brush that comes with it is too thick. i use an eyeliner brusher instead


Here's a puffer fish shot for liking this prod!

What I had on in the morning stayed put up till I got home and camwhored (thank you smashbox): In2it brow powder, my ususal Joppa foundies, AL's URFP


I used to be lemming for an eyebrow makeup that has a wax to fix my unruly brows.  But I can forget about that now because I'm in love with In2it's Eyebrow Powder's flattering shades and lasting power!

Thanks for reading!


Related Posts Plugin for WordPress, Blogger...