Showing posts with label finishing powder. Show all posts

Ben Nye Banana Luxury Powder Review: Why It Didn't Work For Me


on , , ,

14 comments

My week-long love affair with the Ben Nye Banana Luxury setting powder ended when I realized I wasn't really getting what I hoped it would give me. I expected the loose powder to give me a healthy-looking skin but I ended up looking aged and unpretty as it mattified my skin way too much.

    I'd say the Ben Nye Banana Luxury powder works best for oily, light skin

The good stuff in that transparent plastic tub is that it:

  • contains finely-milled powder that did not break me out
  • provides the skin a good amount of warmth it needs
  • made my huge pores invisible
  • was priced at P450.00 at the time I bough it (latter part of Feb 2013) which is already sulit for 42g of loose powder especially when all you need is a very small amount per application.

Because the Ben Nye Banana setting powder proved to be a magical pore eraser as soon as I apply it, I gave it more days for testing even though I frowned at the way it made my skin look flatly matte. Now, the horror begins two hours after application: its oil controlling power nosedives from excellent to poor; my poreless cheeks turn very dry; my skin generally turns from matte to dehydrated. The highly reviewed setting powder did not work well for my combination skin. (Check out reviews from Liz, Donna, and Nikki).

The reviews I've read complained about the packaging. I would've too but because I taped up most of the dispensing holes, I din't have powder flying out every time I used it. Everyone hates product wastage.


    You can depot the powder to a sifting jar or tape it the way I did to prevent product wastage

This is an international brand but we have local resellers. I trooped to PureBeauty Serendra (they also have a Trinoma branch) but this is always out of stock. I finally purchased at an online store, Style Quarter (back when multiply was still around).

The Ben Nye Banana Luxury powder is a medium to heavy coverage loose powder that gives liquid foundation a longer wear time by setting it matte. Oil control is fair and while it does not give ample coverage for heavily blemished skin, it is a powder that has a low risk for breakouts. If you can buy the 42g tub at P450-500 and you are on the lookout for powders that give off a highly matte finish, then this product may just make it in your HG list.


Vanilla on My Skin | Nature Republic Vanilla Sky Pact Review


on , , ,

3 comments

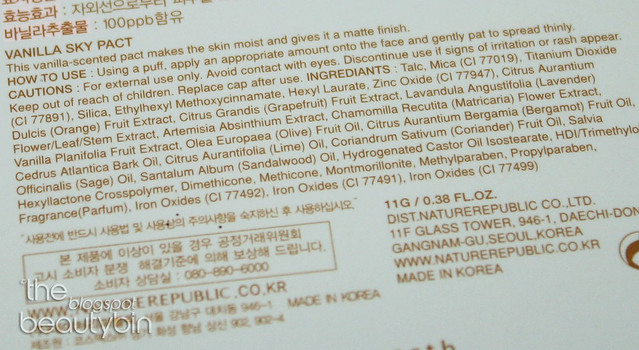
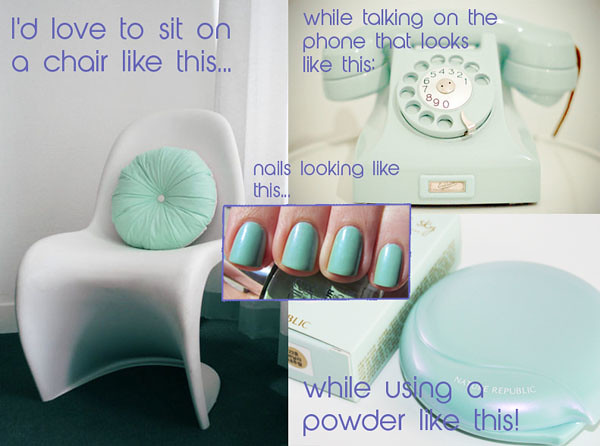
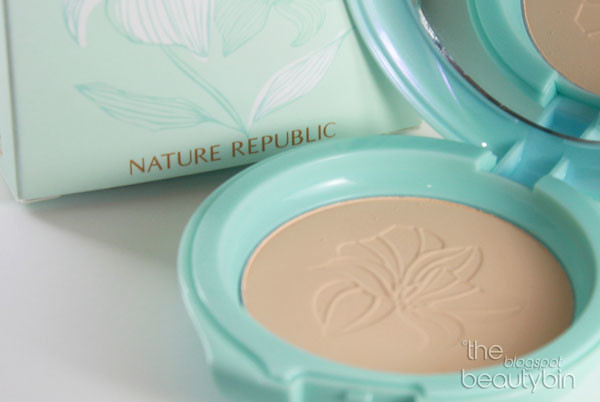
Nature Republic's Vanilla Sky Pact SPF 30 PA+++ sure is a looker on the counter with its adorable mint cream case reminiscent of Paul & Joe products (and even the nail polish bottles are!). 

Nature Republic Vanilla Sky Pact 23


The powder smells as good as its name --- vanilla. I love that it is finely milled and gives a velvety smooth, matte finish. My scarred skin might frown at the fact that it doesn't give any additional coverage for acne scars and marks but I think that with the right shade, this works well in evening out the complexion.

I got the Vanila Sky Pact in #23 (they only have two shades: 21 and 23) and I think this shade is suited to set very yellow-toned liquid and cream bases. It appears ugly grayish-pink on my face when used solo. I will experiment how this sets off good old Estee Lauder Double Wear in Sand and will fill you in about it soon.


IMG_1519a
'replace cap' daw after use.. hehehe.

  • Price: ~ 500php (will verify with Nature Republic)
  • Availability: Nature Republic counters (SM North, SM Fairview, Festival Mall), contact numbers HERE
  • Expiration: Manufacture date stamped at the back of the compact, not on the box; since it has good preservatives (parabens), I give it 1- 1.5 yrs before I throw it out
Follow Nature Republic on Facebook/ Twitter

While this holds off oil along the T-zone fairly well, I'm wary that it sits on the face. Like you look all made-up though not cakey. It's useful to use a facial mist/spritz to allow the powder to blend better into the skin. (Check out how Earth loved it on her skin)


Mint Cream Stuff Beauty Bin


Overall, I think that the Nature Republic Vanilla Sky Pact is a little expensive considering that there are other   crazy inexpensive pressed powders that are as good as this, even offering a wider shade range. However, if you're not scrimping on setting powders, you'll definitely fall in love with the matte finish this gives off plus its cutesy compact that comes with the softest & smoothest powder puff!


__________________________________________________________________________________
Disclaimer: Product was sent to me for review purposes. Post content is in accordance with my personal experience while using the Nature Republic Vanilla Sky Pact SPF 30.


Mineral Makeup+Clinique Wows Me, My Sister and the Camera


on , , , , , , , , , , ,

No comments

I've told you about my boyish sister's transformation several posts ago.  Lara of NARS Shang did her makeup and hairdo and she looked totally stunning.


A couple of months ago, she had an event she needed to go to and we no longer had Lara around.  And so, half-heartedly (i can tell!), she obediently entrusted me to 'transform' her.

Grabbed this pic from her facebook page.  This makeover surprised her friends and they wanted to keep a memento of it.   They even made an effort to create this fancy pic.


This is her on normal days:


With Ate's Makeover (this was 3 hours after the party already and the cheek makeup's no longer visible):

after clinique's toner and moisturizer:
FACE: Clinique's Pore Minimizing Serum as primer on tzone area only
Clinique Superfit in Neutral applied with fingers
EDM Golden Medium in original glo applied with Charm stippling brush
Joppa Full Coverage in Grecian gold (2-3 layers) applied with Charm stippling brush
buffed mineral powders on face using Nichido kabuki brush
Aromaleigh finishing powder in peaches n cream applied with Charm stippling brush
EYES: In2it eyebrow powder using my bleak angled brow brush
Nichido liquid eyeliner (black)
Fanny Serrano curlash
Maybelline Unstoppable Shiny Black mascara
no eyeshadows, i'm still a newbie with it
Freshlook contact lens
CHEEKS and LIPS: Nichido pink blush (forgot the name)
 The Bodyshop Lip and Cheek Tint on lips

It was such a simple makeup that I did considering she was going to a function where practically all the ladies were glammed up.  We had no time to visit the salon and my poor sister was hoping I could help her with her look.

I don't think I failed, did I?


Review: Aromaleigh's URFP


on , , , ,

3 comments

I never liked setting my foundie with a powder because it just ruins the entire look. Give me a handful of time, say 10 minutes, and I'd look like a soiled gal with a dirty face. Ulk. A royal turn-off, I must say.

But then came Aromaleigh's Ultra Resolution Finishing Powder (URFP). This is a setting/finishing powder made of I bought their translucent variant online and I have to say that I'm very, VERY, very, VEry impressed. I use my EDM FT brush for this to achieve that airbrushed look!


Aromaleigh URFP translucent, FULL-SIZE, 0.5 oz net vol
Ingredients: silica, mica and i
ron oxides
Amount: $13.75 (~ 670+PHP)+ $5 int'l shipping+ 35PHP customs tax (QCPO)


The Edge:
  • totally masked my big pores giving me that soft focus
  • eliminated that "dirty" look due to my oily T-zone
  • kept me looking fresh throughout the day
  • re-application needed only after several hours (it takes 6 hours for me to retouch)
  • my sensitive skin didn't break out
  • it made me look FLAWLESS!
  • a teeny weeny amount is needed and Aromlaeigh's URFP full-size can go a looooong way (I say six months, daily application)
  • ingredients are skin friendly, promising reduction of fine lines and imperfections.

Uh-ohs:
  • not available locally
  • the sifter jar makes it so easy to allow some powder to spill (what I did was I transferred some of the contents to another sifter jar so that I don't waste the precious URFP)

Look at how it perfectly fits my palm! Will certainly fit your purse, too!


*****************
ROYAL RATING: Spend-worthy? Absolutely! We're giving it: PERFECT!
*****************


I'm waiting for the peaches and cream variant I ordered a few weeks ago. Most gals claim that this surpasses the Aromaleigh URFP translucent. I can't imagine that there can still be something better than this! Good job, Aromaleigh!

What's your setting powder? Or are you like me that gets freaked out with how powders make the skin look weird?

Royally yours, Bleak

You, too, Can Get that Ulzzang Look!


on , , , , , , , , , , ,

11 comments

The first time I ran through the shots of the girls sporting the ulzzang (or ullzang) look, I dissed myself for not knowing make-up and stuff as much as I should.

Despite my run-of-the-mill skills in make-up, I pushed myself to watch youtube vids on how to get the much coveted "ulzzang" look. Ulzzang is a Korean term that connotes a pretty face. Who wouldn't want that? And so I ventured...

(thanks, Nikki of Askmewhats for the inspiration)

(Disclaimer: This is my death-defying act with make-up because I badly wanted to TRY the fad... the authentic ulzzang look necessitates circle lenses and falsies... but I don't have those and so I went ahead with what I've got on hand.)

xoxoxoxoxoxoxoxoxoxox

Five Cheap (and easy!) Ways to Get the Ulzzang Look


Ulzzang Look Step 1: Make your eyes magical with double eyelids

My biggest problem is that my left eye's lid is waaay thinner than my right eyelid.

my assymetric lids

I scanned youtube for tuts on creating double eyelids. I made sure I practiced these "lessons" several times till I got used to using an eyelid glue right. Koji Eyetalk is what most of the girls use, but since we don't have that locally, I opted for:

Aido Eye Putti 140PHP (roughly $3)


we glue and poke!

Finally, I now have a better left eyelid!


Ulzzang Look Step 2: Conceal the bags and line the eyes!

A Nichido concealer came in handy to hide my eyebags and dark undereye areas.

I used a black gel liner to line the upper and lower (outer third) lash lines. Then, I used a silver highlighter on the inner lower corner of the eyes (used L'oreal illumination in 915 Highlight Reflets)
Fanny Serrano's gel liner, 220PHP (roughly $ 4.50)

the black liner+white liner tandem widened my eyes


Ulzzang Look Step 3: Apply eyeshadow

I am no pro at eyeshadows. They are the last thing I'd learn to do mainly because it looks difficult. So I just slathered a basic bronze shadow on my lids and highlighted my browbones (used L'oreal illumination in 915 Highlight Reflets). If you can do shadows well, I'd bet you'll be perfectly uzzlang-ish!
Body Shop Cubes Palette, I used Shade 04, Rich Bronze $22

now you know what i mean by hating eyeshadows... i can barely let them appear on my eyes!


Ulzzang Look Step 4
: Apply Mascara and fill the brows

Using light sweeping motions, I filled the gaps in my brows with Avon eyebrow liner (brown).

I used my all-time fave mascara to add that girly touch to my flutters.


Lash curler and Maybelline Unstobble Mascara in Shiny Black, around 300PHP (roughly $6)


Ulzzang Look Step 5:
Finish with light powder and lip balm!

Just to keep the oil at bay, I used Aromaleigh's Ultra Resolution Finishing powder. Add Burt's Bees Lip Balm, and you're all set!

Although the real (and very pretty) Ulzzang look is based on circle lenses and long flirty lashes, I skipped those parts because, one, I have yet to buy those, and two, I haven't found the guts to play around with circle lenses and falsies. Here is my final ulzzang look:


If I can be Ulzzang (even just on the average), then so can you! Go ahead, quit hesitating and start digging up that train case! Try on that Ulzzang look you've long been wanting to do!

Related Posts Plugin for WordPress, Blogger...